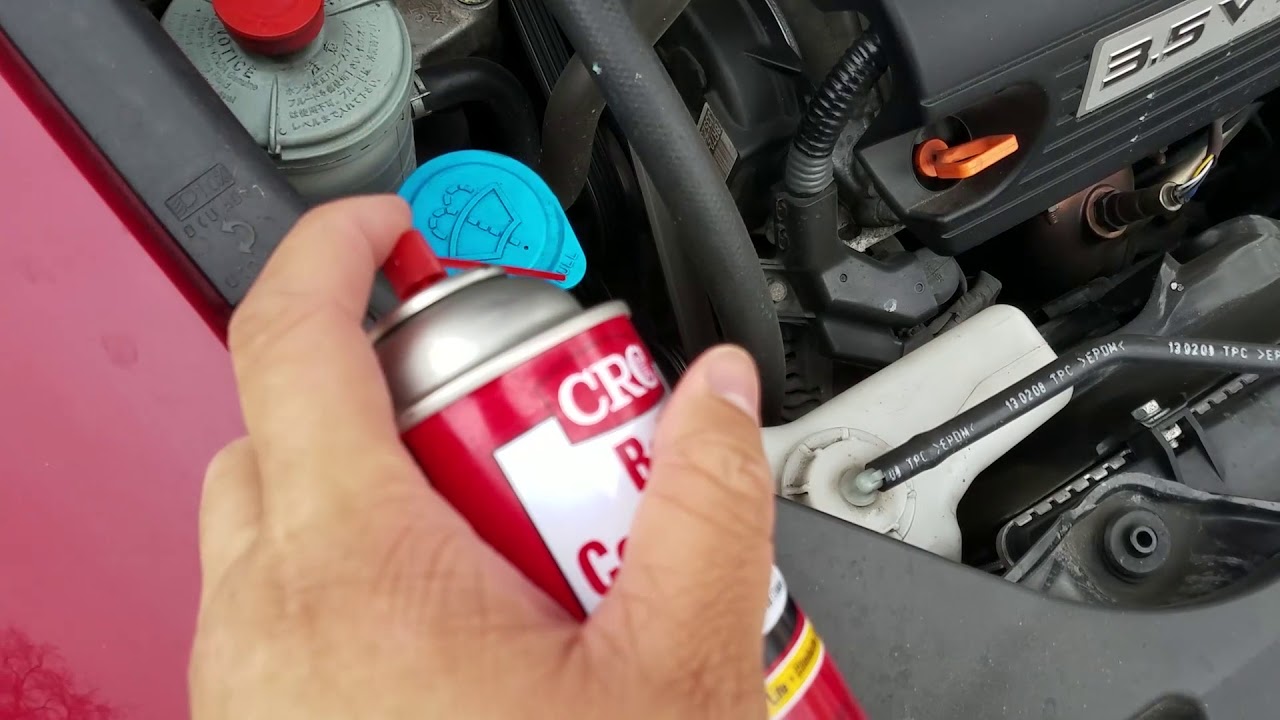
You can clean light, dry surface dust from an accessible serpentine belt without removing it. The engine must be switched off, cool, and unable to start. Use only a clean cloth lightly dampened with water, and rotate the engine only by an approved manual procedure if more belt surface must be reached.
Cleaning is not a repair for oil, coolant, power-steering fluid, deep grime, glazing, worn ribs, poor tension, or pulley misalignment. Dayco advises replacing an oil-soaked serpentine belt because petroleum contamination can weaken and swell its EPDM material (Dayco, How to Fix Serpentine Belt Noise).
Never wipe, spray, or touch a belt while the engine is running. A moving serpentine drive can pull hands, clothing, hair, and tools into pulleys without warning.
Key Takeaways
- Clean only minor dry dust with the engine off and a barely damp cloth.
- Never use belt dressing, oil, WD-40, solvents, or harsh degreasers.
- Replace a belt soaked by engine oil, coolant, or power-steering fluid.
- Fix the leak and clean contaminated pulleys before fitting a replacement belt.
- Persistent squeal or chirp requires drive-system diagnosis, not repeated cleaning.
Can You Clean a Serpentine Belt Without Removing It?
Yes, but only the accessible belt surface can be wiped safely without removal. This method is suitable for loose dust or a small amount of water-soluble road residue. It cannot clean the complete ribbed surface, pulley grooves, hidden belt sections, or contamination trapped within the EPDM.
Modern serpentine belts often use ethylene propylene diene monomer, or EPDM. This material resists heat and cracking better than older compounds, but it still wears and can be damaged by inappropriate chemicals. Gates identifies premium EPDM as the construction used in its Micro-V accessory belts (Gates, Complete Micro-V Serpentine Belt Kits).
Cleaning is reasonable only when all these conditions are met:
- The contamination is light, dry, and superficial.
- There is no active fluid leak.
- The belt is not swollen, soft, glazed, frayed, or missing ribs.
- The belt tracks correctly on every pulley.
- The tensioner does not bounce excessively.
- The engine can remain fully switched off throughout the work.
- You can reach the belt without placing a hand near sharp or hot components.
If you cannot see or reach the affected area safely, do not improvise. Removing the belt or arranging professional inspection is the correct next step.
When Should You Replace the Belt Instead of Cleaning It?
Replace the serpentine belt when fluid has soaked into it, its ribs are worn, or its structure has changed. Dayco specifically states that contact with motor oil, power-steering fluid, antifreeze, or another petroleum-based lubricant can weaken and swell an EPDM belt. An oil-soaked belt should be replaced, not washed and reused.
| Belt Condition | Clean Without Removal? | Recommended Action |
|---|---|---|
| Light dry dust | Yes, if safely accessible | Wipe gently with a barely damp cloth |
| Small amount of clean water | Usually | Let it dry and inspect for noise |
| Engine oil | No | Repair leak, clean pulleys, replace belt |
| Power-steering or transmission fluid | No | Repair leak and replace contaminated belt |
| Antifreeze or coolant | No | Repair leak, clean drive, replace belt |
| Fuel or solvent | No | Replace belt and identify contamination source |
| Belt dressing or oily spray | No | Clean pulleys and replace belt |
| Embedded grit in the ribs | Not effectively | Remove belt for full inspection or replace it |
| Glazing, swelling, fraying, missing rib material | No | Replace belt and inspect the drive system |
| Squeal with no visible dirt | Usually not helpful | Diagnose tension, alignment, pulley drag, and wear |
Continental’s automotive belt training guidance lists oil, coolant, and other fluid contamination as a reason to eliminate the leak, clean the pulleys, and change the belt (Continental, Power Transmission Group Automotive Workbook).
Replacement also becomes the safer choice when the belt’s history is unknown and wear is substantial. An apparently clean belt can still have worn rib profiles that reduce grip.
What Do You Need to Clean Light Dust Safely?
The safe tool list is short. You need good lighting, eye protection, gloves, and a clean lint-free cloth lightly dampened with water. Avoid adding chemicals unless the vehicle or belt manufacturer explicitly approves a product for that exact application.
Prepare:
- Vehicle owner’s manual or service information
- Safety glasses
- Close-fitting work gloves
- Clean microfiber or lint-free cotton cloth
- Small container of clean water
- Flashlight or inspection light
- Belt-routing diagram or a clear photograph for reference
- Appropriate hand tools only if the manual permits manual engine rotation
Do not prepare an aerosol spray. Overspray can reach the alternator, electrical connectors, bearings, painted surfaces, hot exhaust parts, or the belt’s ribbed side. Applying water directly to a running belt is sometimes described as a diagnostic test by belt manufacturers, but it is not a general cleaning method for an untrained owner.
Before starting, remove loose jewelry and secure long hair and clothing. Keep the ignition key away from the vehicle. On push-button vehicles, move the key fob outside its operating range.
How Do You Clean a Serpentine Belt Without Removing It?
Switch off the engine, let it cool, and prevent accidental starting. Then wipe only the belt sections you can reach without moving guards or placing fingers between the belt and a pulley. The cloth should be damp, not dripping, and the process should not leave liquid pooled in the drive.
Step 1: Park and isolate the vehicle
Park on level ground, select Park or neutral as specified by the manufacturer, and apply the parking brake. Switch off the ignition and remove the key. Wait until the engine, exhaust, and cooling-system components are cool.
If another person has access to the vehicle, tell them not to start it. Accidental remote starting is a serious risk on equipped vehicles.
Step 2: Find the routing diagram
Locate the belt-routing label under the hood or consult service information. Take a clear photograph of the installed belt. Although this method doesn’t remove the belt, the image helps identify a belt that has climbed a pulley edge or entered the wrong groove.
For more detail about multi-rib drive layouts, see TranBelt’s guide to ribbed belt applications.
Step 3: Inspect before cleaning
Use a flashlight to inspect the belt’s back, edges, and visible ribs. Look for missing material, frayed edges, exposed cords, swelling, hard shiny patches, cracks, or ribs that have separated. Check whether the belt sits centrally on each visible pulley.
Also inspect the surrounding engine for leaks. Fresh fluid above the belt usually means cleaning will be temporary and may spread contamination farther around the drive.
Step 4: Test the residue with a white cloth
Lightly touch the accessible belt back with a clean white cloth. Dry gray dust may be removable. A greasy, colored, sticky, or chemical-smelling deposit suggests fluid contamination. Stop and identify the source instead of trying stronger cleaners.
Do not press a cloth into the point where the belt enters a pulley. Even with the engine off, spring-loaded tensioners and unstable tools can move unexpectedly.
Step 5: Wipe the accessible belt surface
Dampen a clean section of cloth with water and wring it out thoroughly. Gently wipe along the belt, not aggressively across its edges. Use a fresh cloth section as dirt transfers. Do not scrub hard enough to abrade the belt printing or rubber surface.
Avoid flooding the ribs. Without removing the belt, you cannot reliably wipe liquid and loosened debris from every groove.
Step 6: Reach another section only by an approved procedure
The safest option is to clean only the visible section. If more surface must be exposed, follow the vehicle manufacturer’s manual engine-rotation procedure. This may require a socket on the crankshaft bolt, a specified transmission position, and rotation in one direction only.
Never bump the starter, use remote start, or ask someone to crank the engine while your hands or tools are near the belt. Do not turn an accessory pulley to force the engine around.
Step 7: Let the belt dry
Leave the hood open until the wiped surface is dry. Remove all cloths, lights, and tools from the engine bay. Recheck that the belt sits correctly on every visible pulley.
Step 8: Start from a safe position and observe
Stand clear of the belt before starting the engine. Watch from a safe distance for a belt that wanders, flaps, or causes excessive tensioner movement. Switch off the engine immediately if the belt tracks off-center or a new noise appears.
Do not reach into the engine bay while it is running. Any further close inspection happens only after shutdown and isolation.
How Should You Clean the Pulleys?
You cannot properly clean pulley grooves while the belt remains installed. The belt blocks the contact surfaces, and pushing a cloth or brush between belt and pulley creates a trapping hazard. If the grooves contain oil, coolant, rubber deposits, or embedded grit, remove the belt according to service instructions.
With the belt removed, a technician can inspect:
- Crankshaft pulley grooves
- Alternator pulley or overrunning decoupler
- Tensioner and idler pulleys
- Air-conditioning compressor pulley
- Water-pump pulley where belt-driven
- Power-steering pulley on hydraulic systems
- Pulley alignment and bearing movement
Continental recommends correcting the fluid source, cleaning pulley surfaces, and changing a contaminated belt. A new belt installed on oily grooves can quickly slip, swell, or become noisy.
Pulley cleaning should follow vehicle and component instructions. Protect electrical equipment and sealed bearings. A chemical suitable for bare metal may still be unsafe for pulley coatings, seals, plastics, nearby hoses, or the replacement EPDM belt.
What Products Should You Never Use?
Do not apply products intended to make the belt shiny, sticky, lubricated, or temporarily quiet. Modern serpentine drives depend on correct rib geometry, tension, alignment, and material friction. Chemical treatment can hide a fault without correcting it.
Avoid:
- Belt dressing
- WD-40 or penetrating oil
- Engine oil or silicone lubricant
- Brake cleaner
- Carburetor or throttle-body cleaner
- Petrol, diesel, kerosene, or mineral spirits
- Acetone and strong solvents
- Undiluted household degreaser
- Tire shine or rubber conditioner
- Abrasive pads, wire brushes, or sandpaper
- Pressure washing or compressed-air blasting at close range
Dayco explicitly warns never to solve serpentine-belt noise with belt dressing. A treatment that quiets the belt briefly may contaminate it, attract dirt, and mask low tension or pulley misalignment.
Soap is also not automatically safe. Residue can alter friction, and the user cannot rinse and dry the entire belt while it remains fitted. Plain water on a barely damp cloth is the conservative option for superficial dust.
Why Is Belt Dressing a Bad Idea?
Belt dressing was associated with older friction belts, but it isn’t a repair for a modern EPDM multi-rib drive. Dayco identifies belt dressing itself as a form of fluid contamination and advises against using it to correct squeal.
A noisy serpentine belt usually points to one or more mechanical conditions:
- Insufficient tension
- Worn tensioner spring or damper
- Pulley misalignment
- Worn belt ribs
- Accessory or idler bearing drag
- Incorrect belt length or routing
- Fluid contamination
- Debris packed into pulley grooves
Adding a sticky coating changes friction without correcting any of these faults. It may also make later diagnosis harder because the belt and pulleys become coated with a new substance.
For a comparison of belt constructions and drive principles, see TranBelt’s overview of mechanical power-transmission belt types.
What Should You Do About Oil or Coolant Contamination?
Stop the leak first, then replace a soaked belt and clean the pulley system. Engine oil, power-steering fluid, coolant, fuel, and other automotive chemicals can alter belt material or friction. Repeatedly wiping the visible surface doesn’t remove fluid absorbed by the belt or trapped in its ribs.
Common contamination sources include:
- Valve-cover or camshaft seal oil leaks
- Front crankshaft seal leaks
- Oil-filter housing or oil-cap spills
- Power-steering hose or pump leaks
- Water-pump, thermostat-housing, or radiator-hose leaks
- Coolant spilled during service
- Air-conditioning or engine-cleaning chemicals
After the leak is repaired, inspect the entire accessory drive. Replace the belt if it was soaked, swollen, softened, or persistently noisy. Clean contaminated pulley grooves before installing the new belt and inspect tensioner and idler bearings for damage.
A brief splash and a saturated belt are not identical, but the condition can be hard to judge in place. When fluid has reached the ribs or remained on the belt, replacement is a modest cost compared with losing alternator, water-pump, or steering assistance while driving.
Why Does the Belt Still Squeal After Cleaning?
Persistent noise usually means dirt wasn’t the root cause. Dayco separates accessory-drive noise into chirp and squeal patterns and lists misalignment, low tension, worn pulley bearings, belt wear, improper installation, and contamination among the common causes.
| Noise or Behavior | Likely Areas to Inspect |
|---|---|
| Repetitive chirp that rises with engine speed | Pulley misalignment, damaged ribs, incorrect installation |
| Sustained high-pitched squeal | Low tension, accessory drag, fluid contamination |
| Grinding or rumbling | Idler, tensioner, alternator, compressor, or water-pump bearing |
| Belt flutter or tensioner bounce | Weak tensioner, pulley decoupler fault, accessory vibration |
| Edge fraying | Misalignment, damaged pulley flange, incorrect belt seating |
| Rubber dust near one pulley | Slippage, misalignment, bearing drag, or pulley damage |
Do not diagnose a running belt by placing a screwdriver, hose, hand, or cloth near it. A workshop can inspect pulley alignment, tensioner travel, bearing condition, accessory drag, and belt wear with the drive safely isolated.
Replacing only the belt may not solve the noise. Gates notes that failing to replace worn tensioners or pulleys can shorten the service life of the new belt and other accessory-drive components.
How Can You Tell Whether an EPDM Belt Is Worn?
Cracks alone are not a reliable wear gauge for modern EPDM belts. Material gradually wears from the ribs, changing their profile and reducing their ability to transfer torque. Gates notes that EPDM serpentine belts can operate for long distances without the obvious cracking associated with older neoprene designs (Gates, Tech Tip on Serpentine Belt Inspection Changes).
Inspect for:
- Rib material loss or a flattened groove profile
- Missing chunks or separated ribs
- Frayed edges or exposed tensile cords
- Glazing or hardened shiny areas
- Swelling, softness, or chemical odor
- Belt tracking outside a pulley groove
- Contamination that has penetrated the ribs
- Excessive tensioner movement
- Noise that returns after the source area is dry
A belt-wear gauge can measure rib wear more accurately than visual crack counting. Follow the belt or vehicle manufacturer’s limits. Replace the drive components as a system when the tensioner, idlers, or pulleys are also worn.
When Should You Call a Mechanic?
Arrange professional inspection when the belt is contaminated, damaged, difficult to access, or associated with persistent noise. Stop driving when belt failure could immediately cause overheating, loss of charging, heavy steering, or other unsafe behavior.
Seek help if:
- Oil or coolant continues to reach the belt.
- The belt walks toward a pulley edge.
- A rib is missing or cords are visible.
- The tensioner oscillates heavily.
- Grinding, knocking, or bearing noise is present.
- The charging warning or temperature warning appears.
- Steering suddenly becomes heavy.
- The belt has come off or partly shredded.
- You cannot isolate the vehicle against accidental starting.
The repair should address the cause as well as the belt. Ask the workshop to inspect alignment, tensioner force and damping, idler bearings, accessory pulleys, leaks, belt routing, and pulley-groove contamination.
Frequently Asked Questions
Can I spray water on a serpentine belt to clean it?
Don’t spray a running belt as a cleaning method. With the engine off and cool, a barely damp cloth can remove light dust from an accessible surface. Spraying can spread debris, wet electrical parts, and leave water trapped in pulley grooves.
Can I use soap on a serpentine belt?
Soap isn’t recommended for routine in-place cleaning because residue can affect belt friction and cannot be rinsed reliably from hidden ribs. Use a lightly water-dampened cloth for superficial dust. Replace a belt contaminated by automotive fluid.
Will cleaning stop a squealing serpentine belt?
Only when harmless surface contamination is the actual cause. Squeal more commonly requires checking belt tension, tensioner condition, accessory drag, pulley alignment, rib wear, and fluid leaks. Dayco advises against using belt dressing as a noise remedy.
Can I use brake cleaner on a serpentine belt?
No. Brake cleaners vary in composition and can affect elastomers, coatings, plastics, and nearby components. They also don’t repair absorbed oil contamination. Follow the belt manufacturer’s guidance and replace a fluid-soaked belt.
Can I rotate the belt by starting the engine briefly?
No. Never crank or start the engine while a hand, cloth, brush, or tool is near the accessory drive. If another belt section must be exposed, use only the vehicle manufacturer’s approved manual engine-rotation procedure.
Should I remove the belt for a thorough cleaning?
Yes, if pulley grooves or the complete ribbed surface require inspection. Once significant fluid contamination exists, however, the belt normally needs replacement. Removal also lets the technician check pulley bearings, alignment, tensioner movement, and accessory drag.
Final Advice
Cleaning a serpentine belt without removing it is appropriate only for light, dry surface dust. Shut the engine down, prevent accidental starting, let it cool, and wipe accessible areas with a clean cloth barely dampened with water. Never reach near a moving belt.
Oil, coolant, power-steering fluid, fuel, solvents, and belt dressing change the decision. Repair the leak, clean the pulley system, and replace a soaked or chemically affected belt. If noise remains, inspect the complete accessory drive instead of applying another product.
TranBelt supplies industrial multi-rib and power-transmission belts for matched pulley systems. To understand profile and application differences, compare Poly-V belts and conventional V-belts before specifying a replacement for industrial equipment.
Sources
- Dayco, How to Fix Serpentine Belt Noise, retrieved 2026-07-13.
- Dayco, What Should I Do If the Belt Is Making a Squealing Noise?, 2021, retrieved 2026-07-13.
- Continental, Power Transmission Group Automotive Workbook, retrieved 2026-07-13.
- Gates, Complete Micro-V Serpentine Belt Kits, retrieved 2026-07-13.
- Gates, Tech Tip on Serpentine Belt Inspection Changes, retrieved 2026-07-13.